Watch the video version of this blog here:
Do you want to learn three microscopy techniques that can take your Foldscope explorations to a whole new level? Let’s expand your skills so you can discover even more of the microscopic world.

Technique #1: Brightfield vs Darkfield
Traditional microscope viewing is considered brightfield microscopy. This means that the light from behind the slide hits the sample directly and passes through the sample and lenses to reach the eye. Figure 2a shows a brightfield image of diatoms captured with a Foldscope, phone, and Foldscope LED light. It can be challenging to clearly see structural details of transparent objects using brightfield viewing. This is because there is very little contrast between the object and the background.
Some specimens are easier to observe, and more striking to view, when the light reaches them indirectly. Because the light is coming from an angle rather than below, the background becomes dark, which contrasts sharply with the illuminated sample. To achieve this effect, shift the LED light on your Foldscope to the side. The background will turn dark and the sample will appear to glow as the diatoms below in Figure 2b.

Technique #2: Cast Impression
Objects that are opaque cannot be viewed through a Foldscope because a Foldscope requires light to transmit through the object being studied. In order to study the three dimensional features of opaque objects, impressions can be made using transparent materials like super glue or clear nail polish. To make a cast impression, apply a layer of nail polish to the object, let it dry completely, peel it off, and place the impression on a slide. This technique is great for studying leaf stomata and veins, and for examining the tiny minute details in fossils! Figure 3a shows the impression of the letter B in the word “Liberty” from a U.S. nickel seen at 140X magnification. Figure 3b shows the inside of the bottom of the letter B at 140X magnification plus the 5X zoom on a phone. The extra magnification makes it look as deep as a cavern!

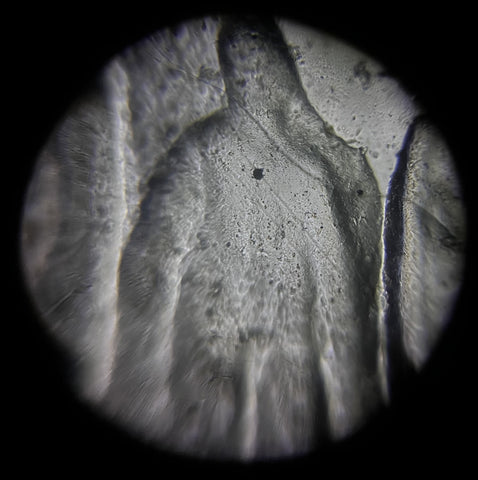
Figure 4 shows the almost ghostly impression of the Abraham Lincoln statue at the top of the steps of the Lincoln Memorial on the back of an old worn down U.S. penny.
Technique #3: Well Slide
Some of the most fascinating microscopic observations are of life that exists in drops of water. Watching microorganisms moving about in their tiny, bustling communities can evoke feelings of wonder. Preparing a well slide is an easy way to help you make the invisible aquatic world visible. A ring sticker from Foldscope creates a three dimensional space that can hold a drop of liquid. To use them, peel the ring off of the sticker sheet, stick it to the center of a slide, peel the clear sticker off the top, add your drop of water, then put the clear sticker back on to seal in the liquid (Figure 5). Place it in your Foldscope for further study. Figure 6 shows a microorganism swimming in a drop of water.

Have fun experimenting with your Foldscope and these different techniques! Share your microscopic images on the Microcosmos and use social media to tag us with the results of your explorations, creations, and discoveries! We love to see how Foldscopers around the world are using their Foldscopes in new and innovative ways!
Facebook: @Foldscope
Twitter: @TeamFoldscope
Instagram: @teamfoldscope


